Saturday 20 August 2016

OpenAM Windows Desktop SSO deep dive - part 1

This post will walk you through the necessary steps to configure OpenAM to authenticate users automatically using Windows Desktop SSO (Integrated Windows Authentication). The OpenAM configuration is quite straightforward, but there are a number of things that need to be in place on the Windows side for everything to work correctly.


Overview of Steps


  1. Set up the required forward and reverse lookup DNS records for OpenAM.
  2. Make a Kerberos principal and keytab file in Active Directory using the ktpass command.
  3. Configure OpenAM for Windows Desktop SSO.
  4. Configure your web browser.
  5. Make sure profiles can be loaded from the Active Directory dataStore.
  6. Configure OpenAM to fallback to a username and password when Windows Desktop SSO fails.

Prerequisites


This guide assumes the following prerequisites are in place:
  1. An OpenAM deployment (I'm using OpenAM 13.5 here) set up on the hostname openam.windom.example.com. 
  2. A Windows Active Directory domain controller with Active Directory certificate services installed (this automatically enables LDAPS on port 636).
  3. This server has the hostname: svr1.windom.example.com, using the windows domain windom.example.com.
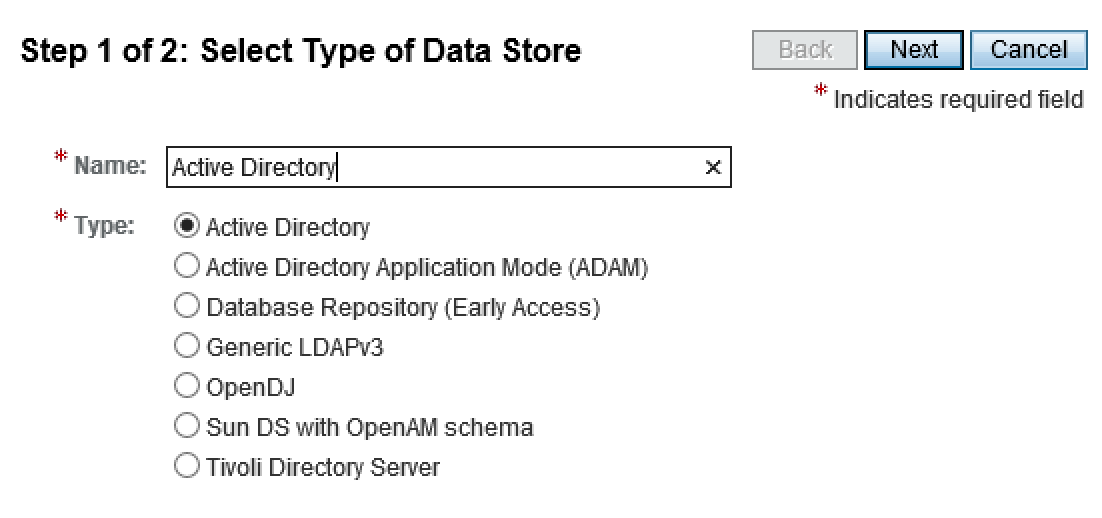
  4. OpenAM setup with an Active Directory dataStore, with users being able to log on using a username and password.
  5. A test Windows Desktop or a separate session on your test domain controller.
I've previously written blog posts on setting up a test Active Directory domain and setting up an Active Directory dataStore. I've used these as a starting point for the steps in this post.


Setting up DNS


  1. A user may access OpenAM via a given hostname, which would often point to a load balancer.
  2. The user must be able to resolve the OpenAM IP address from a DNS forward lookup on the hostname.
  3. The hostname returned from a reverse DNS lookup on the OpenAM IP must match the hostname used in the forward lookup. 
  4. A keytab file should be generated with a Kerberos principal name, which consists of a hostname and a realm name. The hostname in the principal name must match the hostname by which the user can access OpenAM, even if that is the external load balancer hostname.
  5. The principal name configured in the OpenAM Windows Desktop SSO module must match the principal name of your key in your keytab file. 
My steps below will show how to configure the required DNS records an Active Directory DNS service. If this is anything more than a test Active Directory instance, you'll want your friendly Windows SysAdmin to carry out these steps for you.

For Windows Desktop SSO to work, the URL accessed by the user must resolve on a forward AND a reverse DNS lookup with the same IP address and host. This is part of the Kerberos Spec.

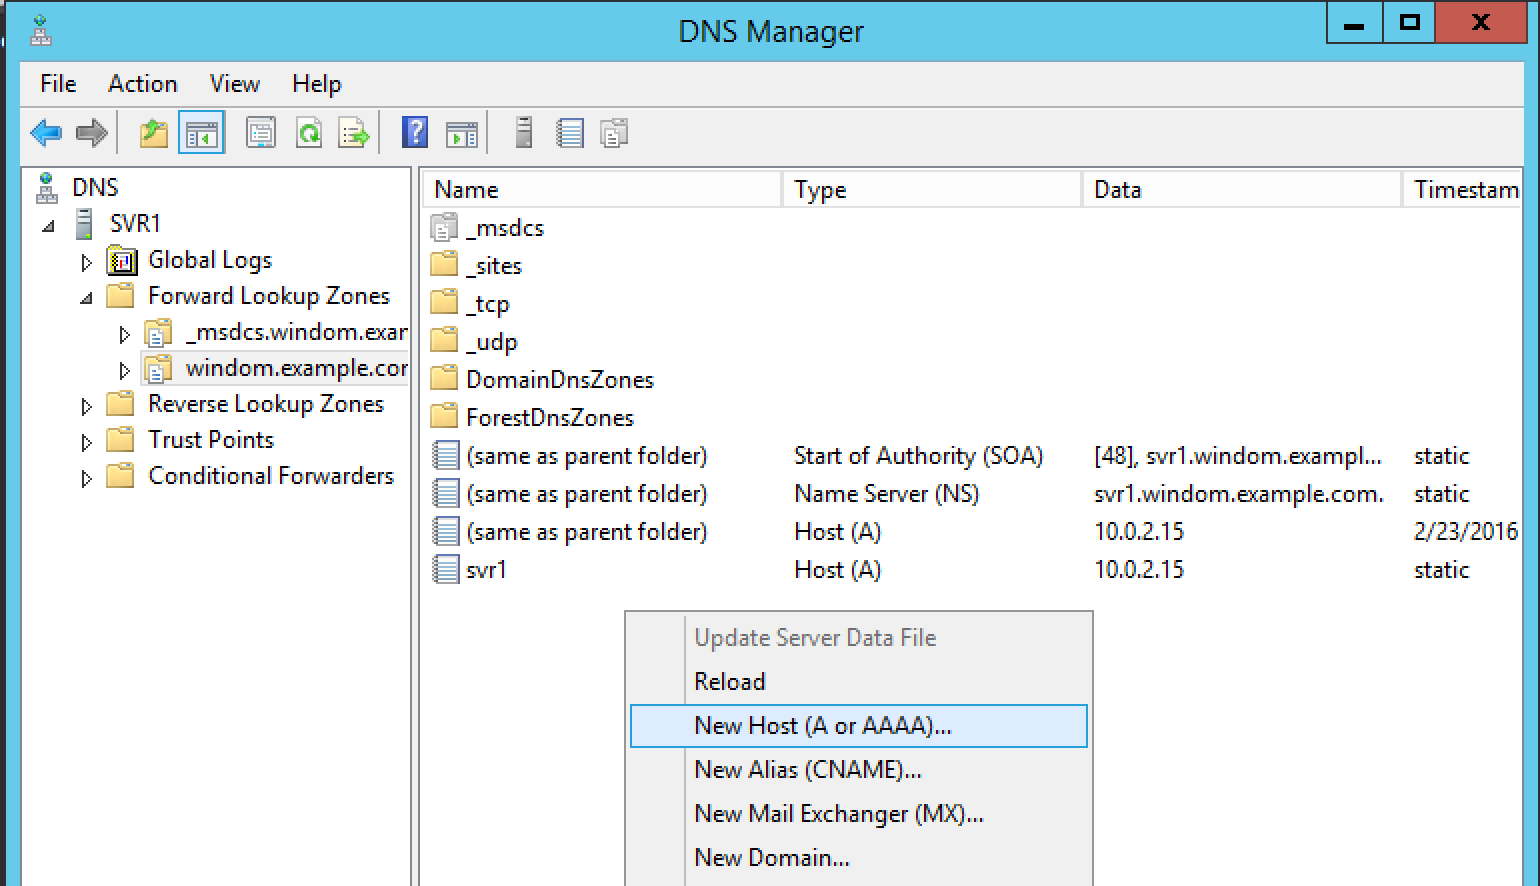
If you don’t have a reverse lookup zone configured on a DNS server in your active directory domain (isn’t set up by default), you’ll need to set one up in DNS Management (dnsmgmt.msc):


Now it's time to specify the subnet for your reverse lookup zone. Note that as part of the DNS standard, only class A, B and C blocks are supported.

The subnet here should contain what is seen to be the IP address of OpenAM from the user's point of view. This is probably the subnet containing your load balancer address.


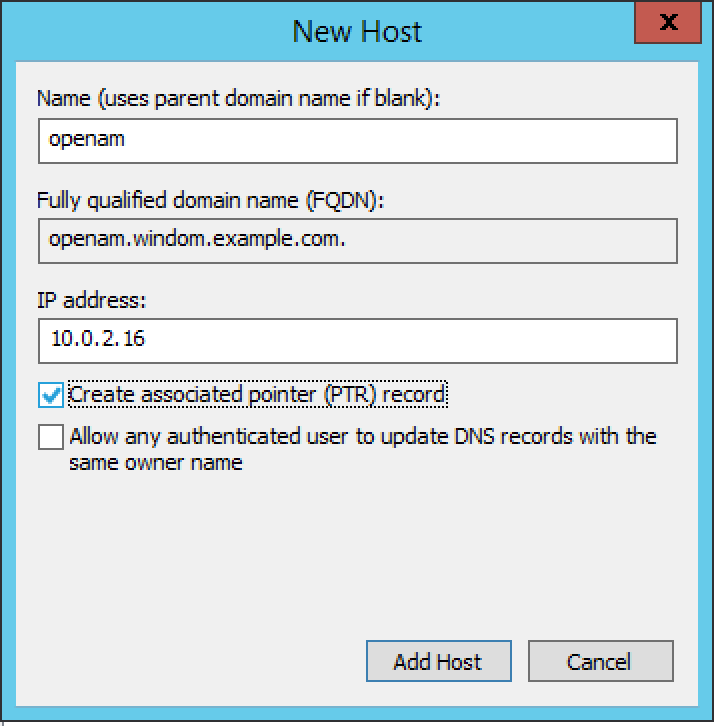
Now create a reverse DNS record for OpenAM. If OpenAM is behind a load balancer, use the IP address of the load balancer. If you don't already have a forward lookup record ('A' record) then you can create both a forward reverse lookup record at the same time when creating an 'A' record by selecting "create associated pointer record":


If you already have an 'A' record for OpenAM, you can assign a PTR record (reverse lookup record) to OpenAM by right clicking on your reverse lookup zone and selecting "New Pointer (PTR)..."


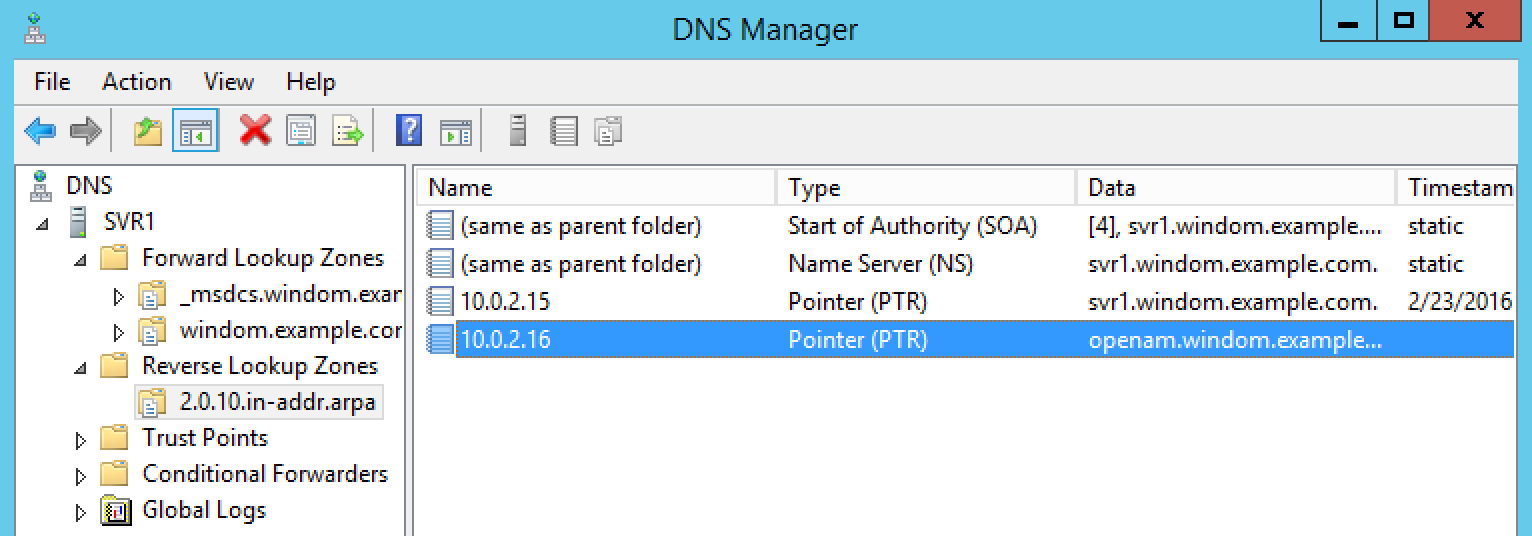
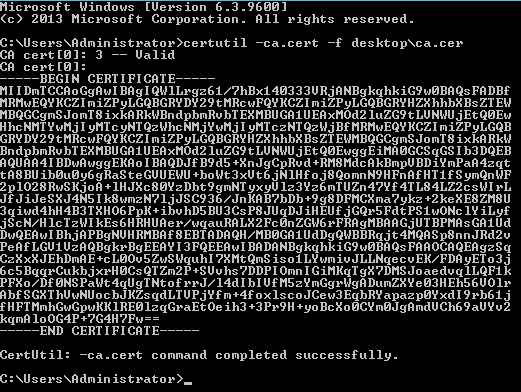
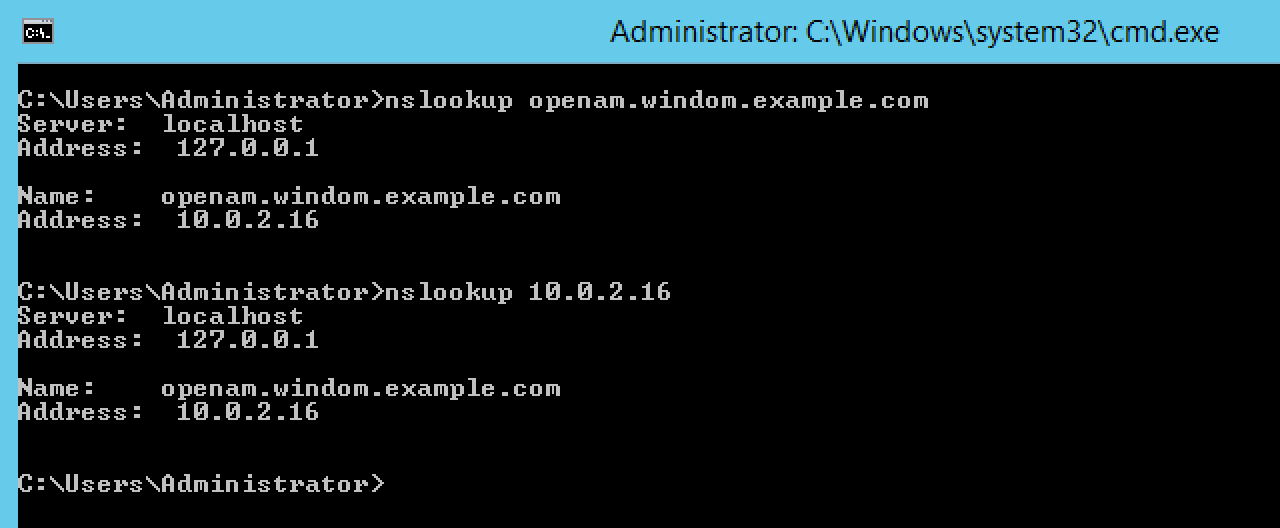
Now that everything is in place, you should be able to perform a forward and reverse DNS lookup on OpenAM and get matching results, like in the following screenshot:


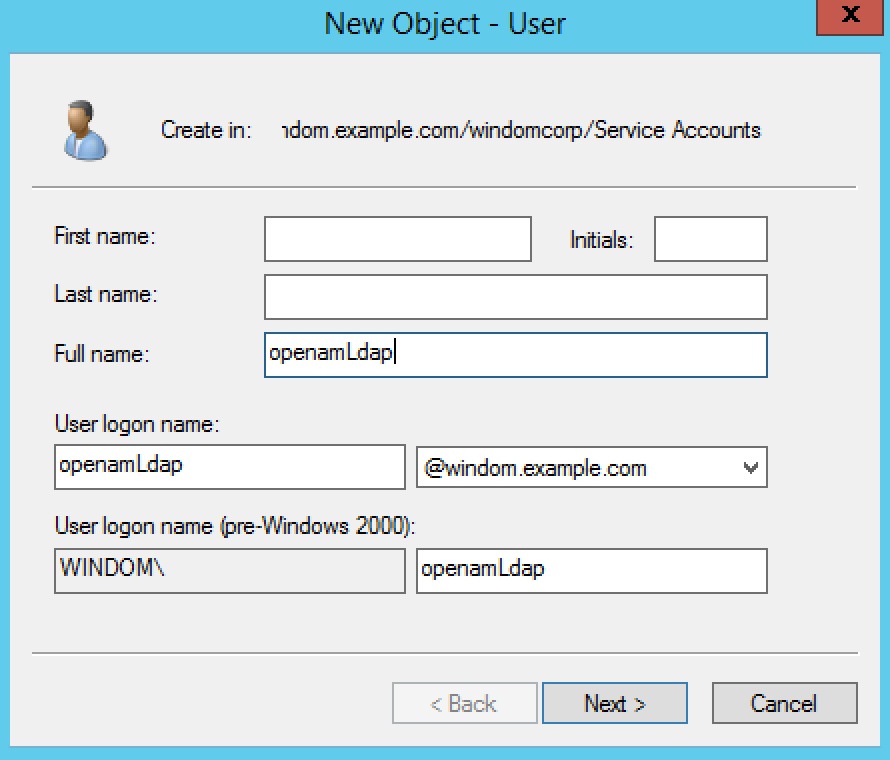
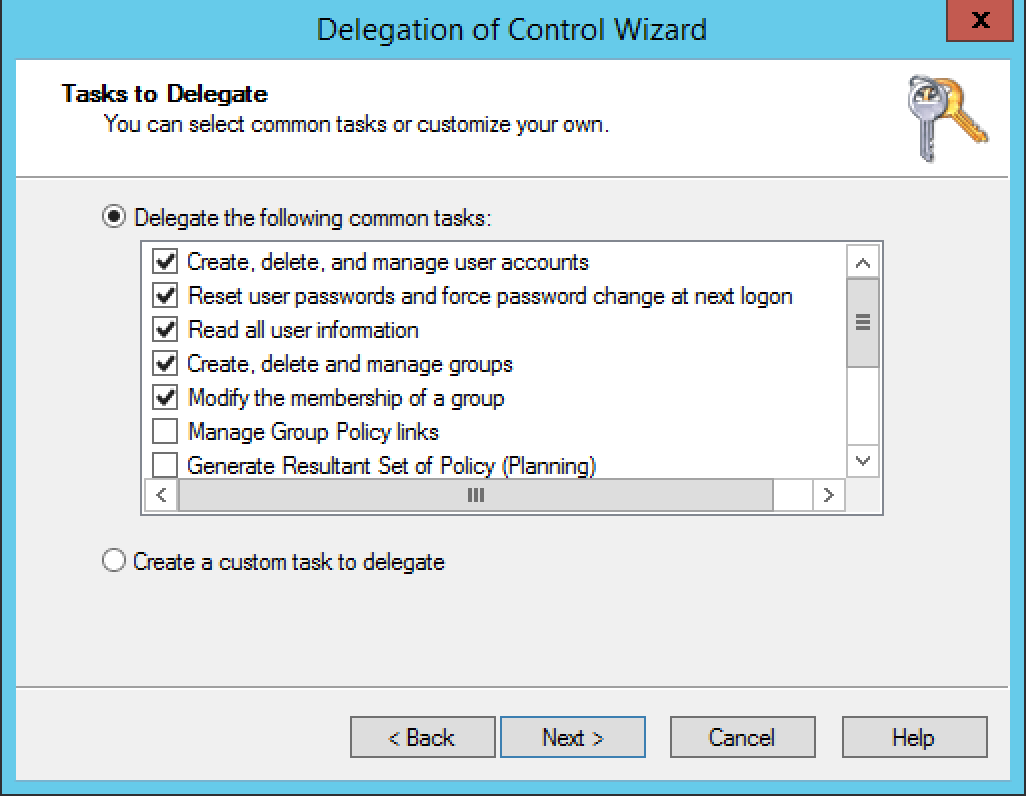
Create an account in active directory for your Kerberos principal


Create an account in Active Directory Users and Computers (dsa.msc) to use as your Kerberos principal. Don’t worry about what the password is, you are about to change it in the next step.


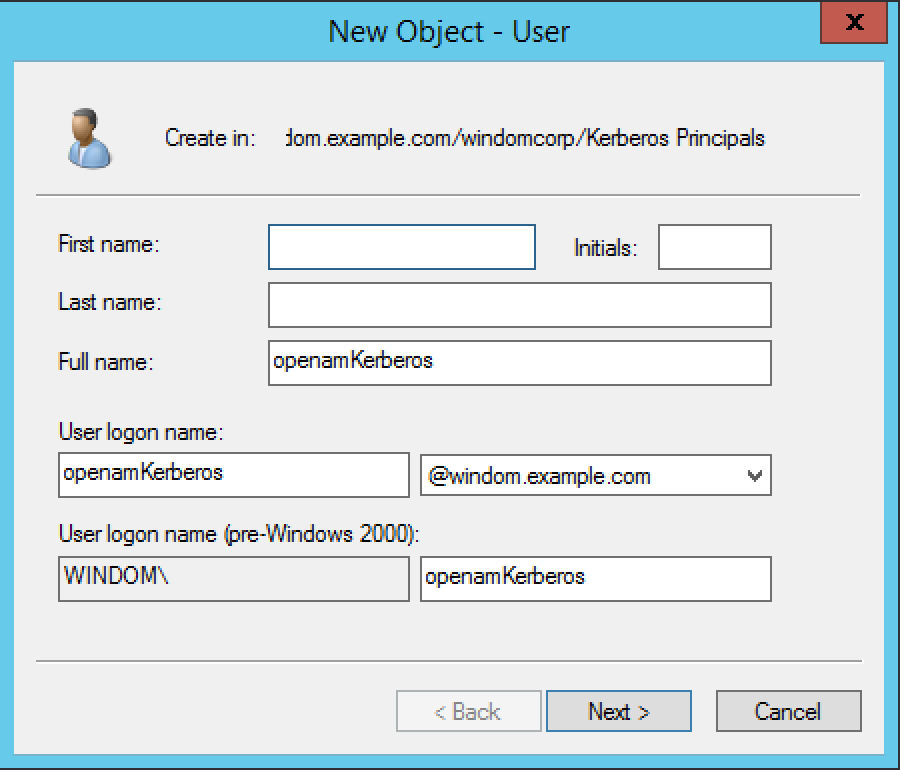
Note that I have set the password never expires flag here. What option you choose is up to you (and your security policy) but remember that when the account password expires, the Kerberos key in your keytab file will need reissuing.

OpenAM uses the GSS API for Kerberos which supports the full 256bit strength of Kerberos encryption, as long as the Java unlimited strength cryptography policy is installed. Select the option to ensure the account supports 256 bit Kerberos encryption in the the account tab:


Creating a KeyTab file


Next you will create a Kerberos keytab file. KeyTab is short for key table. A keytab file is a table of keys that map to Kerberos principals. The keys can be used to authenticate to a Kerberos realm. Keytabs are designed to allow services, applications and scripts to authenticate to a Kerberos realm without human interaction using the key(s) stored in the keytab file. This is part of the Kerberos standard and is not unique to Active Directory.

OpenAM uses the keytab to authenticate to the Active Directory Kerberos realm. Once authenticated, OpenAM verifies the owner of the Kerberos ticket which is supplied in the SPNEGO process from the user's web browser. I will cover this in more detail in part two of this blog post, where I will examine the Kerberos communication with a network analyser.

In Active Directory, you generate keytab files using the ktpass command. This creates a key for an account in AD (a principal) which is derived from the user's password. If the password on the account changes, the key becomes invalid.

The ktpass command also writes a number of attributes to the user account and it can manage transition between two keys. I will cover how this works in the second part of this blog post.

The  following is an example of running the ktpass command on an active directory domain controller. The +rndpass and /maxpass options set a random 256 character password on the account which is then used to derive the key in the Kerberos principal.

ktpass -out fileName.keytab -princ HTTP/hostname.of.openam@KERBEROS.REALM.NAME -pass +rndPass -maxPass 256 -mapuser <userAccount> -crypto AES256-SHA1 -ptype KRB5_NT_PRINCIPAL -kvno 0

As it is case sensitive, make sure that the principal name is in exactly the following format:

HTTP/openam.windom.example.com@MYDOMAIN.EXAMPLE.COM

…where, openam.windom.example.com is the host name of OpenAM. If OpenAM is behind a load balancer, make this the hostname of the load balancer. MYDOMAIN.EXAMPLE.COM is the name of the Kerberos realm - the FQDN of the Active Directory domain.

In the domain we’ve been building so far, the command will look like the below:


You should now have a keytab file:


This file contains sensitive authentication keys. You should store it in a protected file system location, in a similar way to protecting private SSL keys.


Setting up Windows Desktop SSO in OpenAM


Copy your keytab file to a secured location on your OpenAM server(s) and set up a Windows Desktop SSO module. If you have based your configuration on my blog post for setting up an Active Directory DataStore, then you'll want to take the following steps in your employees realm:


Again, make sure the principal name is typed correctly, matching the case below.


Once that is complete, you can make a chain in your realm to begin testing the new authentication module.


For now, I've made a chain that only contains the Windows Desktop SSO module in order to observe any error messages that may occur.


Configuring the web browser


On a Windows Desktop, Internet Explorer, Edge and Google Chrome take a number of browser security settings from "Internet Options" on the Windows control panel. By default, these settings cause a user to re-enter their Windows domain credentials before the browser will submit a Kerberos ticket as part of SPNEGO (aka Integrated Windows Authentication).


Authentication should still succeed, but it's not a very user friendly experience.

The security zones' default settings permit automatic submission of a Kerberos ticket to sites in the Intranet Zone. If you add OpenAM's URL to this zone, the user will automatically be signed on with their Windows credentials.

Again, if you are setting this up on anything more than a test active directory instance, you will want  your friendly Windows SysAdmin to change your internet options, as these settings will most likely be controlled by group policy.

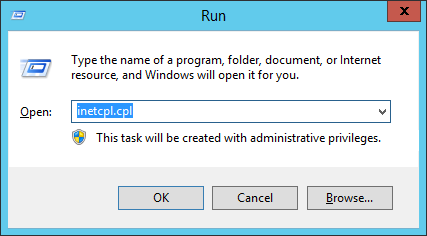
You can find Internet Options on the Windows control panel, but my favourite way to open it (because this works on all versions of Windows since 95) is to run inetcpl.cpl from the command line or the Windows run box (WinKey+R):


This is likely the only configuration required in the browser settings. However, if you are having problems with IE or Edge specifically, check that "Enable Windows Integrated Authentication" is selected on the advanced tab:


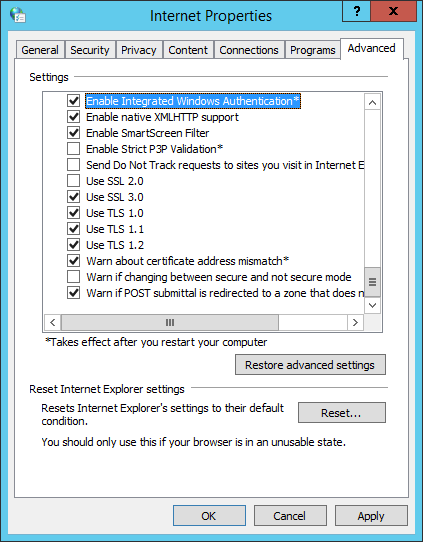
Also check that the security settings for the intranet zone are set to "automatic logon only in intranet zone".


Now try authenticating using the "wdsso" chain:

http://openam.windom.example.com:8000/am1350/XUI/#login/employees&service=wdsso

Make sure your dataStore can load a profile after authentication


You may find that Windows Desktop SSO appears to work correctly now. However, this may apply solely to accounts where the CN matches the Windows account name, such as the domain administrator account.

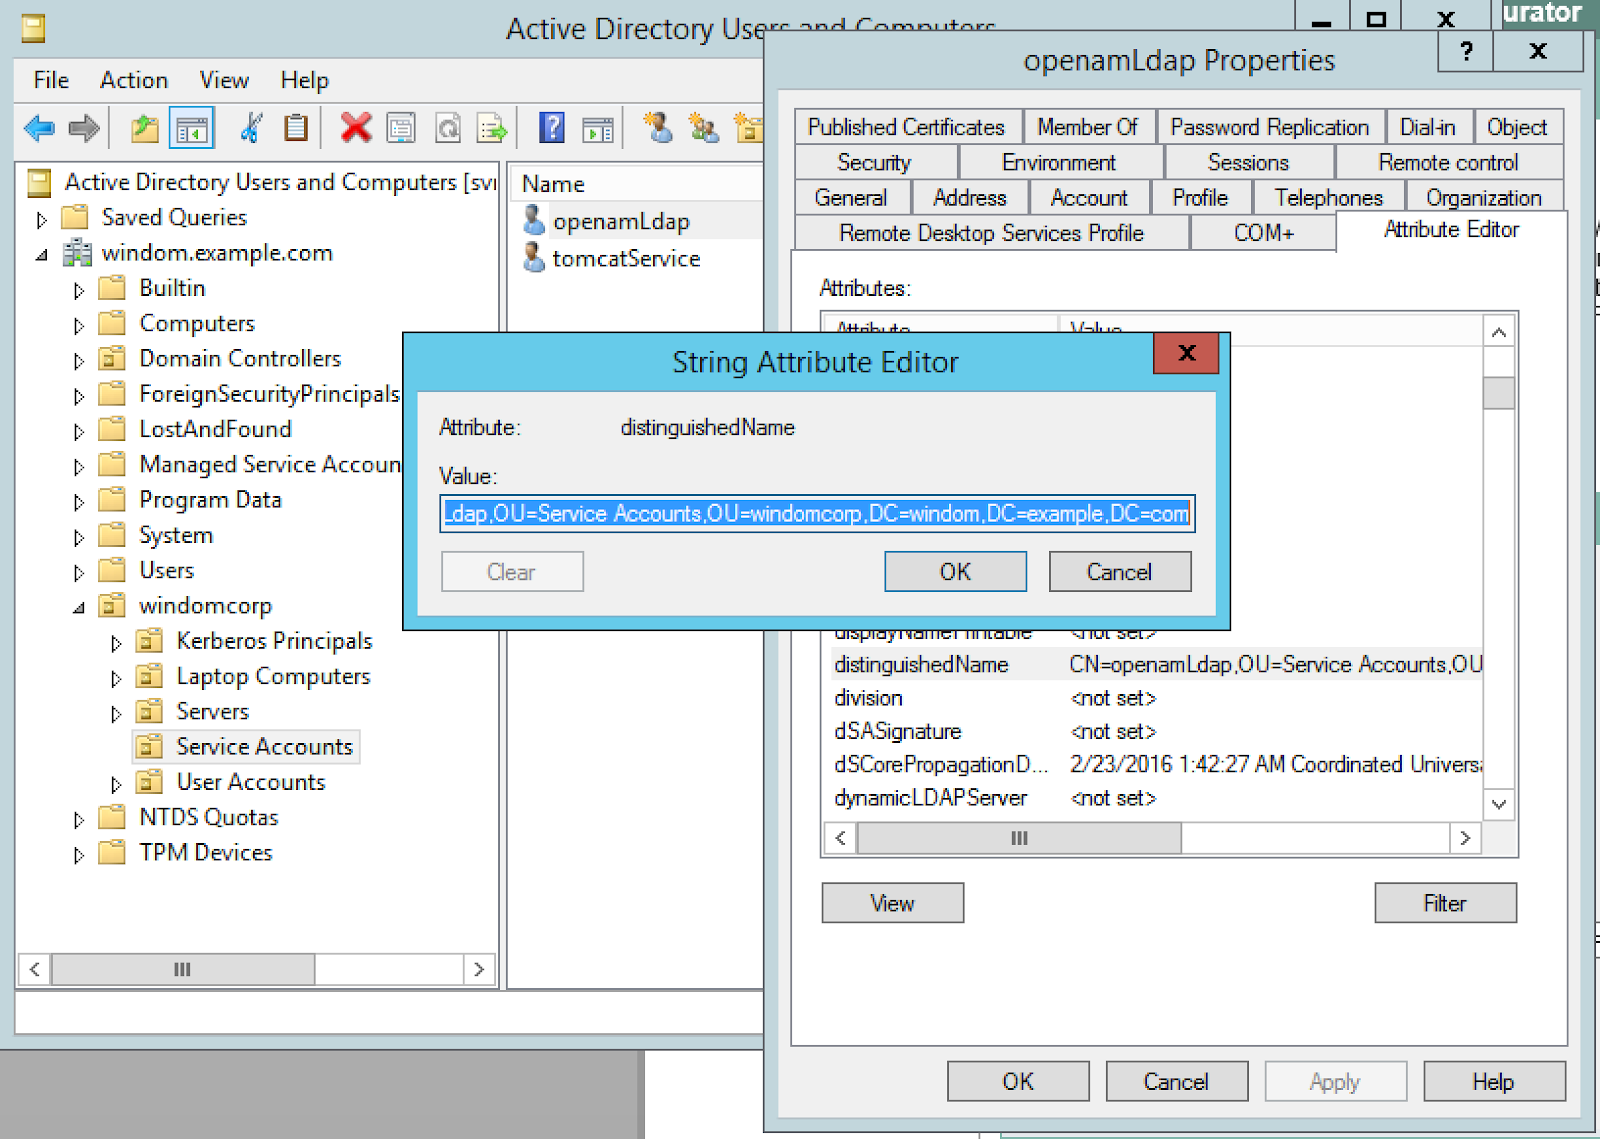
Once OpenAM has authenticated a user using one or more authentication modules, it is normally configured to retrieve a profile from a dataStore - in your case this is Active Directory. In order to retrieve the profile, the authentication modules obtain a name that will be used to lookup the user. The Windows Desktop SSO module provides the windows account name (without the domain component) for this, but the Active Directory type of dataStore is by default configured to search for a user based on the CN, not the "sAMAccountName" attribute, which contains the Windows account name. If the CN does not match the sAMAccountName, as is usually the case in Active Directory, then the profile will not load after authentication. When that happens, you will see the error, "User Requires Profile to Login".


If you have followed my previous blog posts on setting up an Active Directory Domain and setting up an Active Directory dataStore in OpenAM, this error will occur.  In order to rectify, you need to change your dataStore to retrieve the profile using the sAMAccountName attribute:


If you also wish to use the dataStore authentication module and allow users to login with that username, you can change the "authentication naming attribute" in your dataStore.


At this point, you should now be able to authenticate using Windows Desktop SSO. But what happens when the user isn't using a domain-joined computer?

Configuring fallback to the dataStore module


Now that your Windows Desktop SSO module is working and the user profile is retrieved, you will configure an extra module in the chain to allow a username and password prompt to be supplied if the user's browser is not configured for Kerberos authentication.

Below I've set the "wdsso" chain to attempt Kerberos authentication using the Windows Desktop SSO module. Because it is set to "sufficient", it will only proceed to authentication via the dataStore module if authentication via Kerberos fails.


Note: 
Versions of OpenAM prior to v.13.0.0 required a custom error page to be implemented, allowing a failed login on the Windows Desktop SSO module to progress to the next module in the chain. This is no longer required.

UPDATE: That's not quite always true. The change in OpenAM 13 allows the WDSSO module to fall back to another module if the browser has negotiate support turned off, for example as it is by default in Safari and FireFox. However, this won't prevent the login dialog (shown above) from appearing if negotiate support is turned on in the browser, as it is by default in IE. I'll look into this in more detail in my next blog post.

That's it!

Windows Desktop SSO should now authenticate users who are logged in on a domain-joined computer to OpenAM.

Part 2 of this blog post will look at the mechanics behind Kerberos authentication by analysing the network traffic and will also address common scenarios that can cause Windows Desktop SSO to fail.


Thursday 18 August 2016

Setting up an Active Directory DataStore in OpenAM

In this post, I've going to set up an Active Directory DataStore in OpenAM 13.5. If you are familiar with OpenAM's authentication and profile store facilities but struggle with the Windows side of things, then this post is for you.

Overview of Steps


  1. Get OpenAM to trust the certificate on an Active Directory LDAPS service.
  2. Create an account in the Windows domain for OpenAM to lookup accounts with (You aren't using the domain admin account, are you?! ).
  3. Configure a DataStore in a new realm in OpenAM.
  4. Testing login with the default DataStore module

Prerequisites


You'll need these things in place before you can follow the steps below:

  1. An OpenAM deployment (I'm using OpenAM 13.5 here) set up on the hostname openam.windom.example.com. 
  2. A Windows Active directory domain controller with active directory certificate services installed (this automatically enables LDAPS on port 636). 
  3. This server has the hostname: svr1.windom.example.com, using the windows domain windom.example.com.
I've previously written a blog post on setting up a test active directory domain, including the full installation steps and a script for generating test data. I've used this setup as a basis for the steps in this post.


Trusting Active Directory LDAPS certificates


If we want OpenAM to use LDAPS to connect to active directory, then it needs to trust the public SSL certificate for the connection. If you followed my blog post on setting up an active directory domain, then this certificate will have been issued by active directory certificate services. So to get OpenAM to trust that certificate, we can get it to trust the certificate services CA.

First, let's use certutil on our Windows domain controller to export the public CA certificate from certificate services:

certutil -ca.cert -f ca.cer


Then import the certificate into the java cacerts truststore on each of the OpenAM servers in your deployment. On CENTOS 7, that command would look like this:

sudo keytool -import -trustcacerts -file ~/ca.cer -alias windom-ca -keystore /etc/pki/java/cacerts

Create an account in your Active Directory domain


The account we are creating here is used by OpenAM for authentication operations and profile manipulation. If you are using something more established than a simple test Active Directory domain, ask your Windows SysAdmin to do this for you.

In this example, the user is called openamLdap and it is located in an OU called "Service Accounts". This OU is put in place by the sample data script from my blog post on setting up active directory.

Use “Active Directory Users and Computers” to do add the openamLdap account (dsa.msc):


Note that I have set the password never expires flag here. What you choose to do here is up to you (and your security policy) but remember if you choose not to do this, you will need to keep track of password changes for this account.


Once you’ve done that, delegate some admin rights to that account using the active directory delegate control wizard. Below, I'm delegating control of the "User Accounts" OU to the user I've just created. Right click on the OU and select delegate control:


Above we are allowing openamLdap to manipulate users in our User Accounts OU. What you choose to do in your setup is up to you.

Once you’ve done that, enable advance view in active directory users and computers:


Then edit your new account, go to the attribute editor tab and scroll down to distinguished name. Copy this value, you’ll need it in a minute for the OpenAM setup:


Creating a DataStore in OpenAM


In OpenAM, create a realm in the top level realm called employees. In the employees realm, remove the default dataStore and add a new active directory dataStore:

Add the hostname(s) of AD servers with the port number, and add the DN of the user you created earlier. You can use the end of the user DN to get the LDAP base DN of the domain.


In this example, LDAPS is used (this is required if you want to change properties of accounts in AD). LDAPS is not enabled by default in AD. If you don’t have it setup, note that a quick way of enabling it is to install the Active Directory Certificate Services role and reboot. After having done that, you need to add the public cert of the Windows CA to the java cacerts file on your OpenAM server.

You may wish to alter the User and Groups OUs in the DataStore configuration. By default both of these point to the Users container in active directory, but this is usually not used in production active directory services because you cannot create OUs underneath this container. If you choose to alter the default search filters, remember that Active Directory does not support LDAP extensible match rules.

In my setup, I have set the LDAP organisation DN to point to my windomcorp OU, OpenAM is not concerned with anything outside of this. I've changed the default people container naming attribute to OU and my people container value to "User Accounts". This matches "OU=User Accounts,OU=windomcorp,DC=windom,DC=example,DC=com", the location of my regular user accounts which were set up by the script from my previous blog post.


I've done the same thing in the group configuration. The groups configuration must point to a valid LDAP entry that is accessible from our LDAP user account, otherwise OpenAM will fail to load the profile of a user after authentication.


Set the root DN for persistent search:


Now scroll to the top and hit save. Once you head back to the realm options, you should be able to see your users in the subjects tab. If you don’t go back and double check your settings and also look for any exceptions (..and "caused by" exceptions) in the "idrepo" debug log.


If you log out of OpenAM, you should be able to log in as a Windows user from the login page of the customers realm:

http://openam.windom.example.com:8000/am1350/XUI/#login/employees


What next?


In the steps above, we hardly touched on OpenAM's powerful authentication capabilities - we simply used the "DataStore" authentication module that is available by default. If we want our user to logon with something other than the CN, the best option is to use the Active Directory authentication module, which allows you login with different usernames. For example, you could specify sAMaccountName and mail as usernames.

The active directory authentication module also supports the LDAPv3 behera standard, which allows OpenAM to respond to situations such as account lockouts, expired passwords and passwords that must be changed.

In my next blog post, I'll go through the steps to configure this OpenAM deployment to authenticate users with Windows Desktop SSO - the Kerberos part of what is commonly referred to as Integrated Windows Authentication.


Tuesday 9 August 2016

Setting up an Active Directory domain for evaluating the ForgeRock stack

This post walks through setting up a single Windows machine that you can use for testing various parts of the ForgeRock stack that integrate with Microsoft products. It is aimed at those who are tech-savy but new to Microsoft Active Directory.

By the end of the walk through, you should have:
  1. A Windows Active Directory domain
  2. An Active Directory DNS server
  3. An Active Directory LDAP service, running on SSL
  4. Active Directory Certificate Services - a CA.
  5. A kerberos realm.
  6. A vaguely realistic directory layout with sample users.
  7. PowerShell scripts for configuring the above.
The above items should allow you to test:

  1. OpenAM - Active directory authentication, DataStores, self service features and behera password policy support.
  2. OpenAM - Integrated Windows Authentication (Which for some reason we call Windows Desktop SSO in ForgeRock)
  3. OpenAM - SmartCard authentication
  4. OpenAM - ADFS federation with WSFED, SAML2 and OIDC.
  5. OpenIDM - Password Synchronisation
This post will follow the following high level steps:
  1. Setup a Windows VM or cloud instance.
  2. Give the computer an appropriate hostname
  3. Run Windows Update.
  4. Install Active Directory Domain Services (ADDS, also known as “promotion to a domain controller”)
  5. Install Active Directory Certificate Services (ADCS). Amongst other things this is a quick way of installing a certificate on the LDAPS port of a Windows domain controller.
  6. Allow all users to log on locally.
  7. Creating a sample AD structure in PowerShell


Set up a Windows Machine

To get hold of a Windows Server instance that you can start playing with, you can either build an instance yourself on your local or on-prem virtualisation software, or rent an instance from the likes of AWS and Azure.

At the time of writing, the most up to date edition of Windows server is 2012 R2, which is what I will use for the remainder of this post.

I find it easiest to perform most of my testing on a local VM on my laptop. If you don't have an MSDN license or a licensed copy of Windows Server to hand, Microsoft give away a fully functional 180 day trial of Windows Server 2012 R2.

For testing, a Windows 2012 R2 server will scrape by on 2GB of RAM, but I would give it at least 4GB if you can. And while it will install happily on a 20GB hard disk, don't expect there to be much room for Windows updates or any other software you may want to install. Some cloud providers offer 20GB images, I would avoid these if you can afford it. Go with 40GB at least to avoid constantly having to juggle things around.

Setting up a VM and automating it

Install your copy of Windows Server from the ISO file. I won't detail going through the installation steps on the first few screens, they simply ask for things like localisation, keyboard layout and the password of the administrator account. I find that the data centre edition covers all the features I need.

If you want to skip through all of this, you can set up an autounattend.xml file and add it to the root of your Windows Server ISO image. Here is one that I made which works with the 180 day trial images of server 2012 R2. I made this using the Windows ADK, but you can also use some third party generator websites or just start with another one and manually edit it yourself.

If you choose to use my autounattend.xml, it is set up with the following:

username: administrator
password: Cangetinwin1
hostname: svr1
IE ESC: disabled

I have disabled IE ESC (aka that setting that prevents Internet Explorer from doing anything at all on Windows Server) above for testing purposes, but in production I would avoid doing this.

Using a cloud instance

A windows machine in the cloud will likely boot straight to the desktop, there isn't much you need to do. Make sure you can remotely access it by remote desktop (tcp port 3389) from your IP address and make sure you have a remote desktop client handy. Windows obviously comes with one (mstsc.exe), there are some great ones for mac and Linux too.


Choose your weapon - server manager or PowerShell

When you first boot to a Windows 2012r2 desktop, you'll see four icons on the start bar. First is the Windows 8 start menu, which I would avoid.

Second is the server manager. This useful tool provides quick access to almost everything you need to administer Windows server. I will describe using it to access various tools in the remainder of this post.

Thirdly is PowerShell. I'll also describe how to do most things on this post with PowerShell.

The fourth icon is good old windows explorer, which gives you access to the file system.


Run Windows Update

In production, your Windows updates would be carefully managed via group policy and possibly a private Windows Server Update Services (WSUS) Server. For test and evaluation, it's up to you whether you want to get updates from Microsoft. For testing, I would run it once and then turn it off.

To access the Windows Update settings in server manager, navigate to Local Server > Windows Update.


Give the computer an appropriate hostname

You can skip this part if you used my autounattend.xml file above, your hostname will be svr1. Otherwise, in server manager, navigate to Local Server > Computer Name

You can also set the computer name with the Rename-Computer cmdlet in PowerShell:

Rename-Computer -NewName svr1


Install Active Directory Domain Services

Installing active directory domain services (used to be known as promotion to a domain controller) is a two step process. First of all, you install the services required for ADDS. Secondly, you configure it. As usual, you can do these with both PowerShell and server manager.

In the following steps, the following will be configured:
  1. A brand new active directory forest containing a single domain called windom.example.com
  2. A single domain controller, running an active directory DNS server and LDAP service.
  3. A Kerberos realm called windom.example.com

ADDS Using Server Manager

This may seem like a lengthy process, but it mostly consists of clicking next in the installation and configuration wizards. If you are familiar with PowerShell, you may wish to skip to the end of this section and use the PowerShell commands which achieve the same thing.


  1. Open up Server Manager and select "Add roles and Features"

  2. Click Next

  3. You aren't doing a RDS installation, so just click Next.

  4. The local server should be selected, so click next.


  5. Select the "Active Directory Domain Services" role. This will pop up a dialogue asking you to add some features. Go with the defaults, making sure to install the management tools, then click next. Important: Don't install certificate services at this point, this should be done AFTER domain services has been installed.
  6. You probably don't want to install any other features right now, so click next.

  7. There is some general info here about ADDS. Click next.

  8. You can click install at the confirmation stage.

  9. Now the service has been installed, you have to configure it. Note that you can export an XML file here which contains the options you have specified so far. This is useful if you want to script an unattended deployment. Click "promote this server to a domain controller" to continue with configuration.

  10. As we're just creating an AD setup for test and evaluation, "click add a new forest". Specify a domain name. If you are testing, make sure you either use a domain that you own or a valid test domain, such as example.com, example.org or example.net. It's bad practice to use a publicly available DNS domain for Active Directory, so choose a sub domain, such as windom.example.com

  11. Use the default forest and domain functional levels and make sure that you are installing a DNS server. Specify the DSRM password - this is only needed if there is a serious problem with your domain controller that prevents it from booting.

  12. Don't worry about DNS delegation, you are using a locally installed DNS server.

  13. Use the default netBIOS domain name.

  14. Use the default filesystem locations.

  15. You can now review what you have done before you start the configuration. Note that you can export a pre-made PowerShell script at this point containing what you have configured.

  16. The pre-requisites check should pass with some warnings about default security settings and DNS. This build is just for evaluation, so click install.

  17. After a couple of minutes the machine will reboot.

A this point you should now have a working Active Directory domain controller. You will be able to connect to it using LDAP on port 389, but LDAPS is not available yet.

ADDS Using PowerShell

Here is some PowerShell used to configure everything in the screenshots above. The first command uses an XML file that was generated from the "add roles" wizard above. The second command was generated by the configuration wizard.
Install-WindowsFeature -ConfigurationFilePath .\ADDS-DeploymentConfigTemplate.xml

Import-Module ADDSDeployment
Install-ADDSForest `
-CreateDnsDelegation:$false `
-DatabasePath "C:\Windows\NTDS" `
-DomainMode "Win2012R2" `
-DomainName "windom.example.com" `
-DomainNetbiosName "WINDOM" `
-ForestMode "Win2012R2" `
-InstallDns:$true `
-LogPath "C:\Windows\NTDS" `
-NoRebootOnCompletion:$false `
-SysvolPath "C:\Windows\SYSVOL" `
-Force:$true

Installing Active Directory Certificate Services

The following section walks through installing Active Directory Certificate Services (ADCS). This is the enterprise grade PKI infrastructure offering from Microsoft, which you can use to generate certificates for strong authentication, for example when implementing SmartCard authentication.

One nice thing about ADCS is that if you install it on a domain controller, it will automatically issue a certificate for LDAPS and configure the domain controller to use it. The default policy that is enabled on Active Directory prevents changes to any object from occuring over plain text LDAP. Therefore, if you want products like OpenAM and OpenIDM to write anything to active directory, for example when using self service or account provisioning, then you need to be using LDAPS.

ADCS Using Server Manager

  1. Open server manager again and select "add roles and features". Select "Active Directory Certificate Services", accept the suggested features and management tools, then click next.

  2. You don't need any other features right now, so click next.

  3. There is some useful information here.

  4. For now, just install the certificate authority. You can come back and install further services later on if you wish.

  5. Once again, it's time to install the service. Just like with domain services, you can export an XML file for automating these steps.

  6. Once installed, click "configure active directory certificate services" to begin the configuration process.

  7. For our testing, using the default domain administrator account is fine.

  8. Select certificate authority and click next.

  9. We want our CA to be integrated with Active Directory so that it can automatically issue certificates to services like LDAP. Select Enterprise CA and click next.

  10. Create and new private key.

  11. I've increased the default hashing algorithm here from SAH1 to SHA256, as many applications consider SHA1 to be obsolete.

  12. The distinguished name and CN for the CA are set here. These can not be changed, so you may want to consider what they should be for your testing. For my testing with the ForgeRock stack, the defaults are sufficient.

  13. You can increase the certificate validity period here if you wish.

  14. For testing, stick with the default file system locations.

  15. Now it's time to apply the configuration. Unlike installing services like ADDS and ADFS, there is no option here to generate a PowerShell script of your options. I have created a PowerShell command with these options in the next section.

  16. The installation should complete successfully. Now reboot your server. On the next boot you'll find that you can connect to your active directory server using LDAPS on port 636.

ADCS Using PowerShell

The following two commands will apply the above configuration. The first command requires an XML file that was generated from the "add roles and features" wizard.
Install-WindowsFeature -ConfigurationFilePath .\ADCS-DeploymentConfigTemplate.xml

Install-AdcsCertificationAuthority `
-AllowAdministratorInteraction `
-CAType EnterpriseRootCA `
-HashAlgorithmName SHA256 `
-KeyLength 2048 `
-ValidityPeriod Years `
-ValidityPeriodUnits 10

Allow all users to logon locally

This is something that you should absolutely not do on a production domain controller.

By default, Windows server allows two simultaneous sessions from different users without having to enable the full remote desktop services service. That means you can log on to the machine as the administrator and remote desktop in as another user for testing purposes. Windows server usually runs regular desktop applications just fine (it has to for RDS) so it can make it ideal for testing services such as Office 365.

The default policies on a domain controller prevent normal users from logging on. Here, we are going to change that.

Open up server manager and navigate to Local Server > Remote Desktop. This will open the "system" control panel applet (sysdm.cpl), where you can configure remotes desktop. 


Creating a sample AD structure in PowerShell

I've put together a script which generates a predictable list of any number of users and a fairly typical directory layout. The script is largely based on this one by SharePointRyan, only it does a few extra things.

If you wish to use it, copy the script to your machine (you can use remote desktop to copy files). Then execute it:


You should see output indicating that 200 users have been added (this number is adjustable in the script):


The script evenly distributes the users between three OUs representing world regions. It also creates a fairly common directory layout under the OU "windomcorp" (the script uses netbios name + "corp").


Conclusion

That's it. I will use this configuration as a basis for some future blog posts that I have in the works. Next up is integrating OpenAM with Office 365, then I'll do a technical deep dive look at using supporting Integrated Windows Authentication with OpenAM.